Drop everything you’re doing – momma’s making cinnamon rolls!!!
This week since I’m stationed at home (we get seven work-from-anywhere weeks a year at Abercrombie!!), my mom has made it her mission to finally teach me the way to living a happy life during cold winters, by perfecting the art of Swedish cinnamon rolls. These pillows of buttery, cinnamon-sugar goodness certainly seem like they could be a means to an end of curing any wintertime blues. They’re much easier than they look to make and are enjoyed best with a cup of tea at promptly 3:00 PM (fika anyone?). This recipe makes an estimated 40 buns and takes about two and a half hours to make including rising and prep time.
Ingredients
For the dough:
– 1 packet of Fleischmann’s Active Dry Original Yeast
– 1 1/4 sticks of butter (if using unsalted, add 1/4 tsp of salt to the mix to compensate)
– 2 1/2 cups of whole milk (the less fat the milk contains, the drier the bun will turn out)
– 2 eggs
– 1 to 1 1/2 cups of sugar depending on how much of a sweet tooth you have
– 6 to 7 cups of flour (play this one by ear and start with 6 first)
For the filling:
– 2 sticks of butter
– 1/4 to 1/2 cup of sugar
– 1 tablespoon of cinnamon
For the toppings:
– 1 whisked egg
Essential materials:
Directions
1. Start by adding 1 packet of active dry yeast and a couple spoonfuls of sugar (to activate the yeast) to a large mixing bowl.
2. Melt 1 1/4 sticks of butter. When melted, add the whole milk to the butter, and then heat up until just lukewarm; any warmer, it could kill the yeast, so if the mixture is piping hot let it cool off for a few minutes. (If doing so in the microwave, make sure to do it in a microwave-safe bowl and go at 20-second intervals to not make the butter explode).
3. Pour the milk and butter over the sugar and yeast, and stir. Let this mixture sit for 5-10 minutes. The key to this recipe is to get a good rise with the dough, so it never hurts to let something for a little bit longer if you feel it needs it.
4. Once the yeast has started to bloom, stir in an egg and the rest of the sugar required of the dough mixture.
5. Add in flour to the existing mixture little by little (my mom recommends doing 3 cups at a time) and mixing as you go along to keep the buns as moist as they possibly can be because once you add too much flour, there’s no going back.
6. COMMIT TO THE BIT! Now it’s time to combine everything until you have a dough that’s loose and sticky at the same time. You can do this by stirring the dough in the bowl its already in with a steady wooden spoon, kneading it on a clean, floured surface, or using a KitchenAid if you don’t feel like getting another arm workout in.
7. Once the dough is *finally* combined, put it back into the bowl, cover it with plastic wrap, and leave it to rest in a warm area with no draft so it can grow into the bun it’s meant to be. It should double in size before being divided, so let it be for an hour give or take.
8. Preheat the oven to 240 degrees CELCIUS (trust the process K?) and set out 2 sticks of butter for the filling so they can reach room temperature by the time the dough is ready for its final stages.
9. To make the filling, add your two sticks of room temp butter, 1/2 to 1/4 a cup of sugar (again depending on how much of a sweet tooth you have), and 1 tablespoon of cinnamon to a bowl, and combine until you have sugar-cinnamon butter. It’s crucial that your butter is room temp, ’cause if not you’re going to have to give your already shaking arms the pleasure of having to work with rock solid butter.
10. Once the dough has doubled in size, add flour to a clean countertop, and knead the dough around for a little bit. Then, divide it into two, and put one back into the bow; so you can focus on one at a time.
11. Make the dough into a rectangular shape by rolling it out with a rolling pin. Remember – the longer the rectangle in length, the more dough you’ll have to turn into buns. This can be achieved by directing the rolling pin to different corners of the dough, following a sideways ‘X’ pattern.
12. After the dough has been rolled out into an even rectangle, spread half of the mixture also evenly out onto the top of the dough.
13. Fold the rectangle hot-dog style onto itself so if it were to be cut in half the doughey side would be on the exterior, and the filling completely on the interior. Pat it down to make sure everything is intact for the next exciting step, cutting the dough!!
14. Cut the dough into one-inch strips (a pizza cutter imakes this so much more efficient, but a knife will do too!), twist each piece like you’re revving up a motorcycle, and then tie it into a knot. They don’t have to be exactly one-inch strips, but do ensure they’re around the same width so they bake evenly. Place evenly spaced apart onto a baking sheet lined with parchment paper.
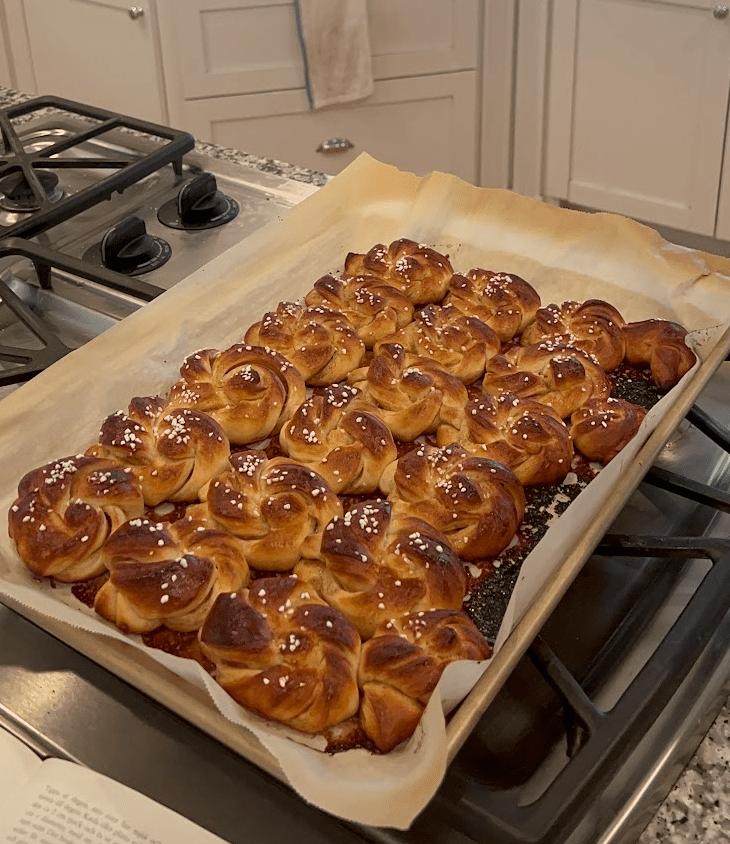
15. It’s allllllll about the details, and these buns wouldn’t be complete without a couple finishing touches to make them even more perfect than they already are! Whisk an egg and use a pastry brush to evenly spread it on top of each bun, and sprinkle some Swedish pearl sugar crystals on top.
16. Pop those buns into your preheated 240 degree CELCIUS oven for 8-10 minutes, keeping an eye on them from time to time.
ET VOILA!!! Enjoy:)
💘 Hanna

Leave a comment